
Candles are an essential component of our day-to-day lives and the soft, comforting glow they emit can make any space feel more inviting and special.
There is, nothing that is more frustrating when your candle burns into the center, leaving behind a hollow tunnel that surrounds the wick.
This phenomenon, which is also known as candle tunneling, is a common ailment that affects a lot of people.
You don’t need to worry about that since we’ve got you covered with our in-depth instruction on how to fix candle tunneling.

How to fix candle tunneling
Contents
- 1 What Does Candle Tunneling Truly Entail?
- 2 Reasons Why Does Tunneling Happen?
- 3 Three Easy Steps to Avoid Tunneling While Using Candles
- 4 Five Different Approaches to Repairing Candle Tunneling
- 5 FAQ
- 5.1 What should I do if the candle I’m burning starts to tunnel?
- 5.2 Which of the following is most commonly associated with candle tunneling?
- 5.3 What is the approach that is the most straightforward for dealing with candle tunneling?
- 5.4 Is it possible for me to continue using candle wax that has tunneling?
- 5.5 What steps can I take to avert the occurrence of tunneling?
- 5.6 If there is tunneling, can I cure it with a hair dryer?
- 5.7 Is the presence of tunneling an indication that the candle is of poor quality?
- 6 Conclusion
- 7
- 8
What Does Candle Tunneling Truly Entail?
The phenomenon known as candle tunneling usually happens when a candle burns into the center, forming a tunnel around the wick while the wax that surrounds it remains solid.
Incorrect burning methods or a product of inferior quality are commonly to blame for this issue.
If the tunnel is not addressed, it has the potential to develop so deep that it becomes difficult to burn effectively, resulting in the waste of a sizably portion of the candle wax. Can you single-fix candle tunneling? Absolutely yes!
Reasons Why Does Tunneling Happen?
When a candle is burned for a short time and the wax is not melted uniformly along the full surface, a phenomenon known as candle tunneling can occur.
When candles are burned in this manner, a tunnel is created around the wick, and a hole will be in the center of the candle.
Instead of melting the wax uniformly across the candle’s whole surface, the flame will create a little vertical tunnel .
The dimensions of the wick can also affect the tunneling process.
Candles that have been made with wax of a poor quality or have wicks that are either too little or too large may not burn evenly and may result from tunneling.

Three Easy Steps to Avoid Tunneling While Using Candles
The most simple method for preventing candle tunneling is to just stop it from happening in the first place.
The following are some suggestions that might assist you in preventing tunneling caused by candles:
- Remove Excess Wick When lighting a new candle, cut the excess wick to a length of about one-quarter of an inch. Tunneling can be caused by a wick that is excessively long because it will burn at an excessive rate.
- Burn for a Long Time: To prevent candle tunneling, be sure to burn them for a sufficient time after they have been lit for the first time. As a result, the wax will be able to melt uniformly throughout the entirety of the surface.
- Be Sure to Buy Quality Candles Candles of lower quality have a greater propensity to tunnel than candles of a higher grade.Be careful to pick candles that are crafted using surrounding wax of high quality and that have wicks of the appropriate size.
Five Different Approaches to Repairing Candle Tunneling
Don’t be alarmed if you’ve already spotted tunneling in your candle; this is very normal. There are some solutions available to you on how to fix candle tunneling:
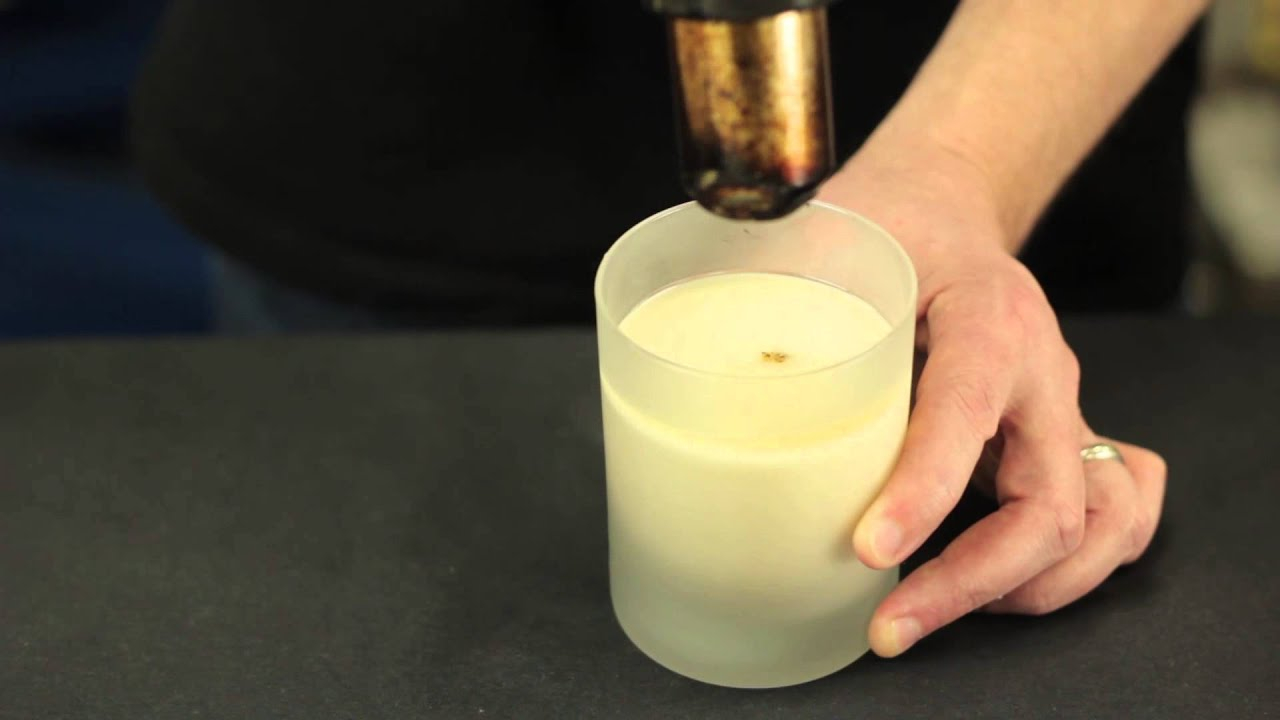
- Make Use of a Candle Warmer: Making use of a candle warmer is an effective method for repairing candle tunneling. Just put it on the warmer, and wait for the wax to melt evenly as it does so.
- Warm the Jar: If you do not have access to a candle warmer, you may warm the candle jar by placing it in a saucepan filled with hot water. This will assist in melting the wax that is around the tunnel, which will prevent additional tunneling from occurring.
- Scrape the Edges: If the tunnel is shallow enough, you may use a spoon or a knife to scrape the edges of the tunnel and smooth out the surface by doing so. This step is only necessary if the tunnel is shallow enough.This will guarantee that it burns at an equal consistency. In the final step, you will need to blow the wax out and then allow it to cool.
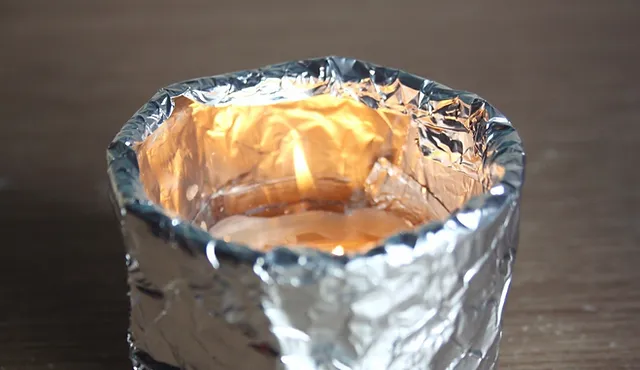
- The use of aluminum foil as a strategy helps regulate the melting of candles. In the event that your candle melts unevenly or overflows, you can use aluminum foil to catch the melted wax. A piece of foil should be wrapped around the bottom of the candle in a manner that is both secure and complete. This prevents wax from spilling out of the candle and ensures that it melts evenly.
- It may be necessary to replace the wick because it may have been obstructed with dirt or wax, or it may have grown too short to reach the wax pool.When replacing the wick, make sure the candle has been extinguished and allowed to cool. To trim the length of the wick, a butter knife or pair of scissors should be used. Put the used wick in the trash.After that, you should smooth up the new wick and position it in the center of the candle. Once the wax cools and solidifies, the wick can be held in place using a wick holder or a pencil. Then, trim the wick, and then fire it.
FAQ
What should I do if the candle I’m burning starts to tunnel?
If the surface of your candle has become uneven due to tunneling, you may even it out by using a candle warmer, heating the candle jar in a pot of hot water, or scraping the sides of the tunnel.
This will assist in melting wax surrounding the tunnel, which will prevent further tunneling from occurring.
Which of the following is most commonly associated with candle tunneling?
Tunneling in candles is most frequently brought on by three factors: burning a candle for an insufficient amount of time, employing a candle wick that is insufficiently thick with the diameter of the candle, and burning a candle of poor quality.
This is something that typically happens with larger candles.
What is the approach that is the most straightforward for dealing with candle tunneling?
Keeping the wax in your candles from melting may be accomplished in a way that is both straightforward and effective by using the aluminum foil trick. A piece of aluminum foil and a candle topper are all that is needed for this project.
When you have done so, place the candle topper on top of the candle and adjust it so that it completely encircles the wick.
After that, cut off a piece of aluminum foil and wrap it around the candle and the topper, being sure to leave a small hole in the middle for air to circulate.
It is important to note that candle toppers operate most effectively with larger candles that only have one wick in them.
A sufficient amount of heat will be reflected by the foil, which will stop the wax from tunneling. This tip comes in handy in particular when working with huge pillar candles or candles with larger diameters.
Give it a go, and you’ll be rewarded with a candle that burns more consistently and for a longer time.
Is it possible for me to continue using candle wax that has tunneling?
Yes, you can still use it. However, it’s important to fix the tunneling before lighting again to ensure that it burns evenly and doesn’t waste wax. Also uneven wax melt it’s not good.
What steps can I take to avert the occurrence of tunneling?
To avoid tunneling, cut the wick to about 1/4 inch before lighting the candle, burn the candle long enough for the wax to melt (or unmelted wax) uniformly throughout the whole surface, and use high-quality candles with appropriately sized wicks.
If there is tunneling, can I cure it with a hair dryer?
While using a hair dryer method can help to fix tunneling, it’s important to be careful not to overheat the candle or the glass jar, as this can cause them to crack or break.
Instead, it’s recommended to use a candle warmer or heat the jar in a pot of hot water to fix tunneling.
Is the presence of tunneling an indication that the candle is of poor quality?
Certainly not in every case.
Although candles of a lower quality are more likely to tunnel than candles of higher quality, tunneling can also be caused by incorrect burning tactics, such as keeping the candle lit for a short time to prevent the wax from melting uniformly throughout the surface.
Conclusion
Even if you do encounter candle tunneling, it is not the end of the world.
If you follow this advice and techniques, you can prevent tunneling from occurring, and if it does occur, you can fix it by following these suggestions and strategies.

Keep in mind that you should only ever make use of candles of the highest possible quality, not all time, with wicks of a suitable length, and that you should burn the candle for an adequate amount of time to ensure that the wax melts evenly throughout the entirety of its surface.
1 thought on “A Step-By Step Instructional Tutorial on How to Fix Candle Tunneling”